
To change a submitted schedule, cancel the existing schedule first, update the date or content, then submit it again. For a piece that has never been queued, you can simply change its planned date.
Check whether the post is actually scheduled
Open the piece's Publish tab and inspect Targets. A date in the Schedule section does not prove the post is queued. Pending means the account is selected but has not been queued; Scheduled indicates an accepted future schedule.
For a scheduled piece, Publish shows Unschedule. If publishing has already started or completed, use the target's current result rather than treating the piece as an editable future schedule.
Reschedule a queued post
- 01Open Publish and select Unschedule.
- 02Wait for the Unscheduled confirmation. If the control says Finishing cancellation…, allow that cancellation to settle before continuing.
- 03In the Schedule section, select Change and choose the new date and time.
- 04Check Timezone, close the picker with Done, and review the displayed date and time.
- 05Select Schedule Now. Confirm the new timing and account list, then check the individual targets for the new schedule.
If Sequence reports Couldn't unschedule, treat the cancellation as unsuccessful. Read the message and check the current target states before trying again. An already-published post cannot be withdrawn by unscheduling its old time.
Choose and check the time zone
The date picker includes the calendar, hour and minute controls, and Timezone. Read the zone rather than assuming it is the same as your location or your client's location.
1. Open the schedule picker
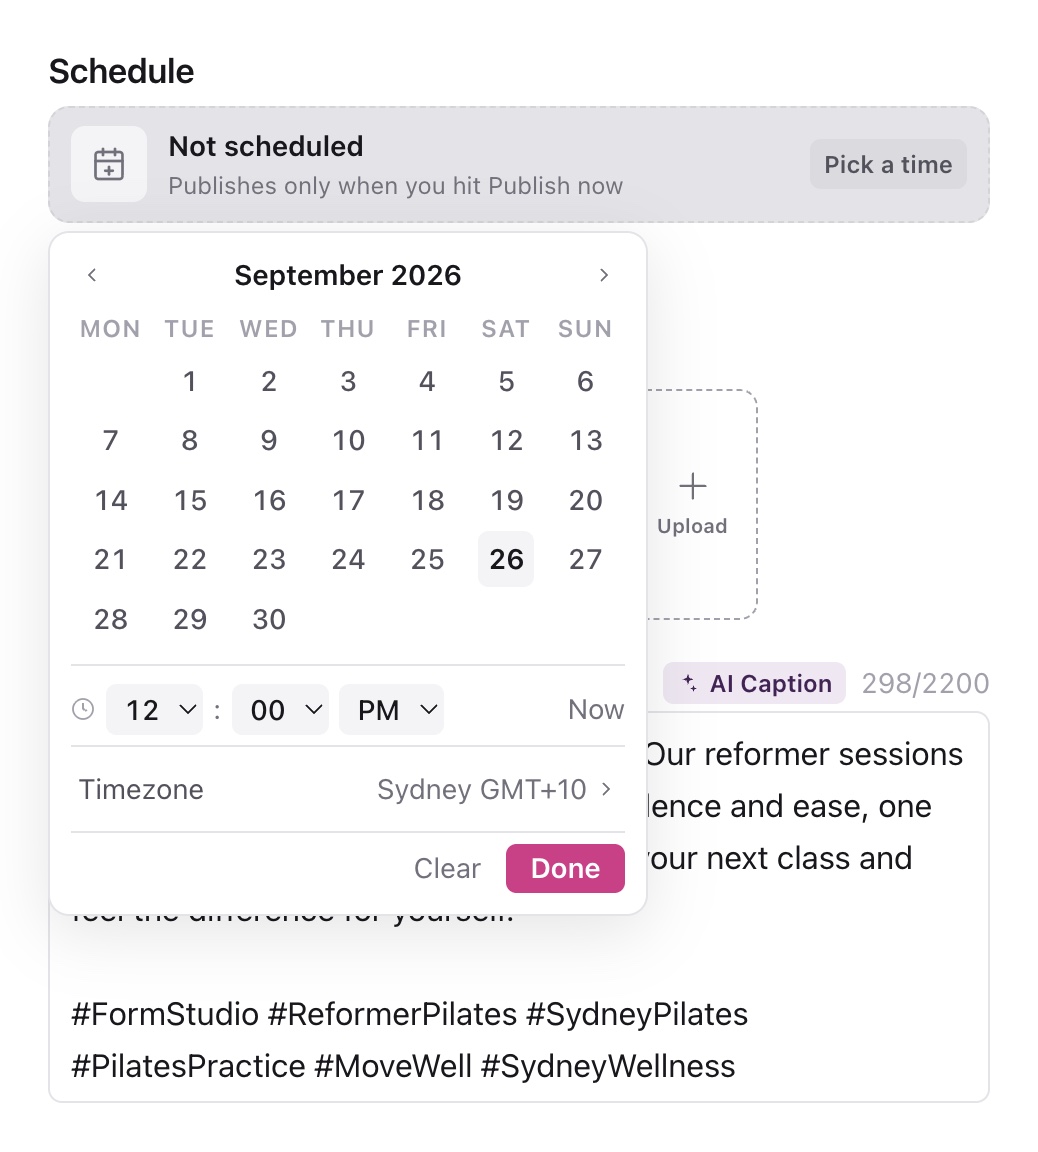
2. Confirm the publishing time zone
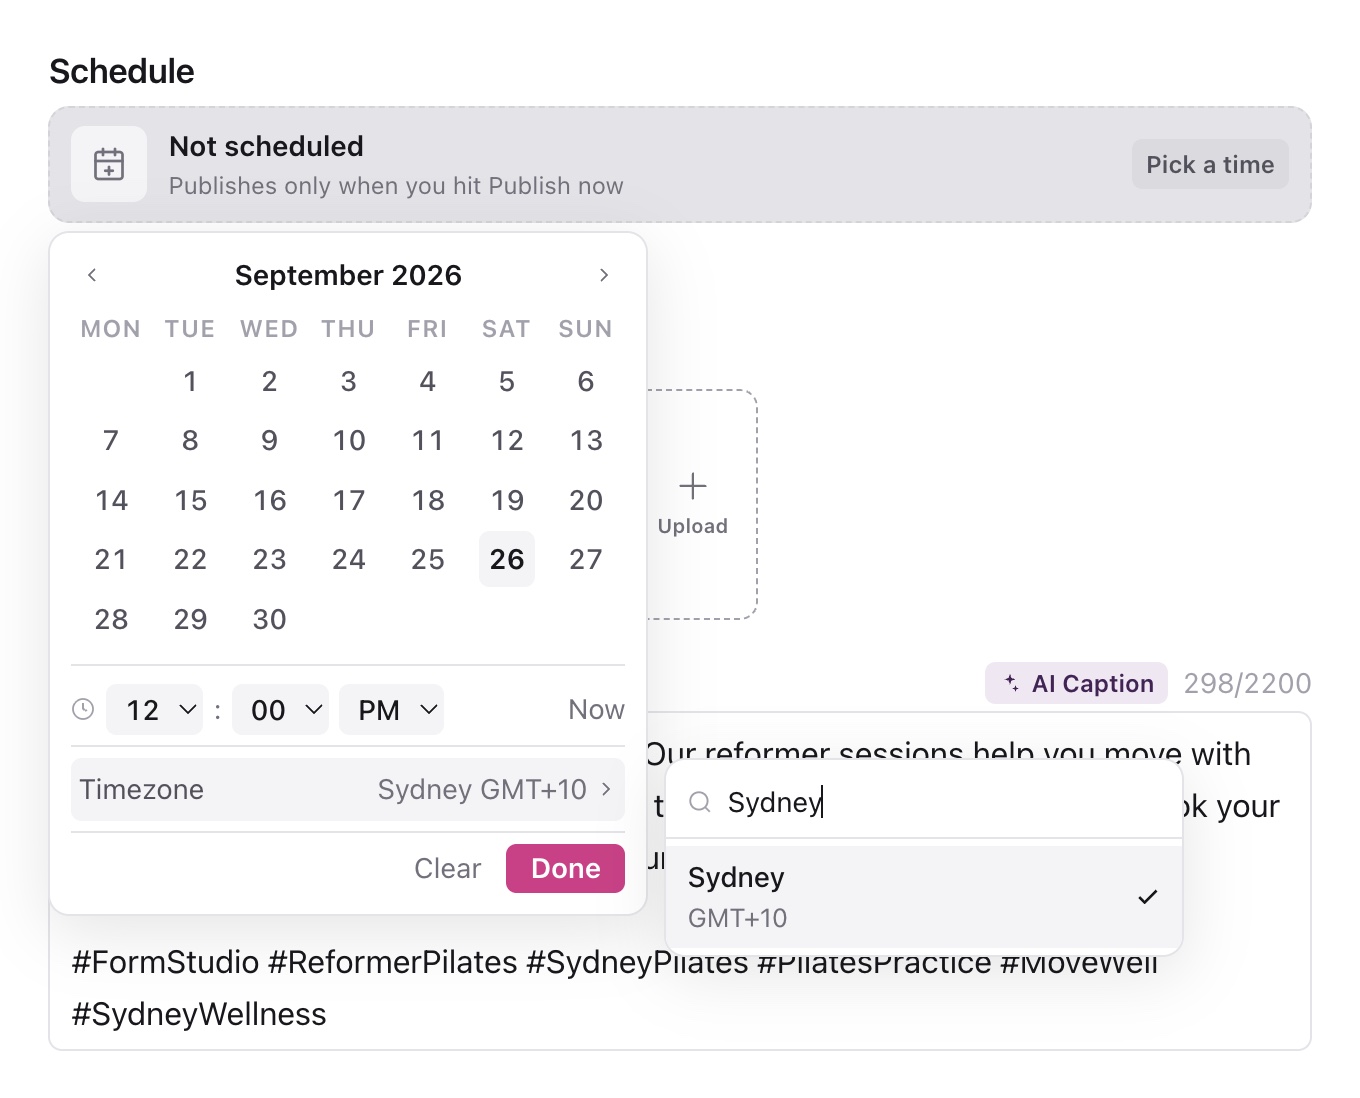
For a client in another city, first agree which local time the request means. Select the intended time zone, enter the date and time, then check the summary after closing the picker. Pay particular attention to dates near daylight-saving changes and posts around midnight.
Now sets the current timestamp. Setting a time does not submit the post for publishing; you still need to confirm a publishing action separately.
Remove a planned date or stop a schedule
For an unqueued piece, use Clear in the date picker or the scheduled-time clear control to remove the planned date. Clearing a date is different from cancelling a submitted schedule, so use Unschedule first for queued content.
After a successful cancellation, the piece remains in Sequence for further work. Reopen Publish to check its content and target states before you decide whether to schedule it again.
Confirm the replacement schedule
The final confirmation is the point to check the future time and destination accounts together. If it says the scheduled time is in the past, choose Update time instead of confirming immediate publishing.
After resubmitting, inspect all targets. If one failed while others were scheduled, use the failed-target guide to resolve that account. Do not create a duplicate piece simply to change the time.
Was this page helpful?
Related articles
Need more help with this?