
Schedule a prepared batch while keeping each post's own date and selected accounts. Bulk scheduling submits the selected posts; it does not automatically spread them across a calendar or choose suitable times for you.
Prepare every post first
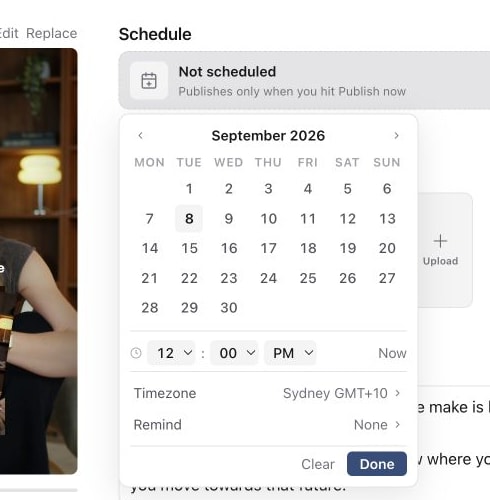
Check each content piece's post time and time zone, media, caption, post type and selected connected accounts. Complete the review required by your workflow and check that you have publishing access.
A date on a content piece is planning information until scheduling is confirmed. Similarly, Ready to post is a workflow state, not proof that a platform has accepted the post into its queue.
Use prepare and preview a post to check the final output. If the batch still needs a client decision, send it for approval before scheduling it.
Select and schedule the batch
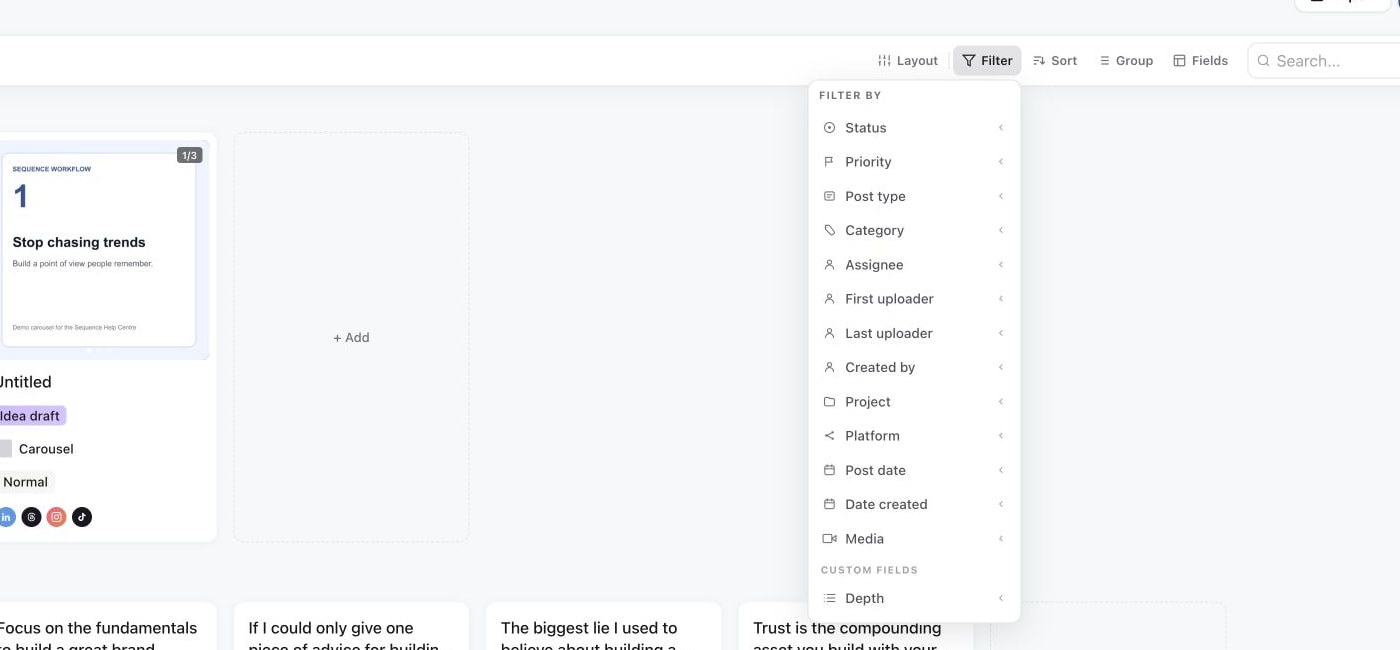
- 01Open the brand's Content planner. Use a view that makes the intended posts easy to identify, and narrow the collection with filters if needed.
- 02Select the individual posts. Check the selection count so an unrelated post is not included.
- 03Open Status in the selection toolbar and choose Scheduled. Sequence opens a scheduling confirmation rather than silently changing a label.
- 04Review the posts, statuses and dates listed in the confirmation. Resolve missing post times, missing selected channels or posts that are not ready for scheduling.
- 05Read the final action. It may say Schedule with the number of posts, or Mark ready and schedule when eligible posts must first become Ready to post. Confirm only when that is the intended action.
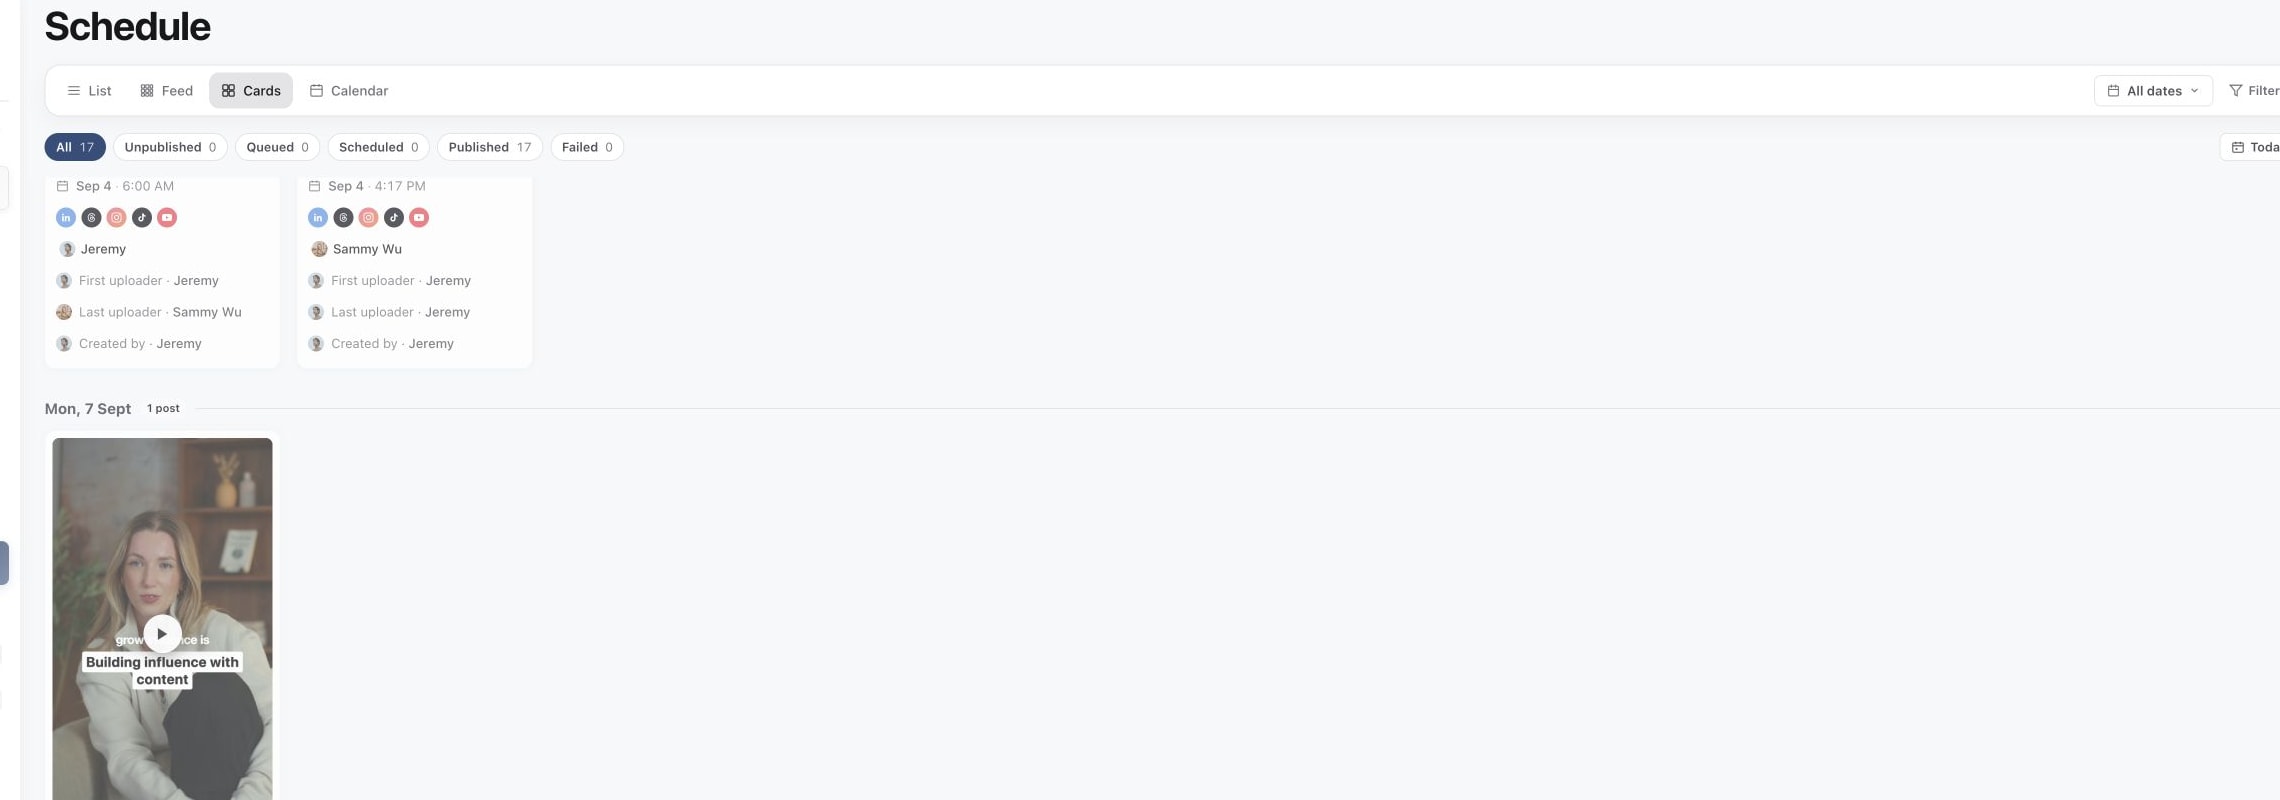
1. Review the Schedule before adding more posts
2. Set the date and time on each post
3. Filter the planner to check scheduled work
Choosing the same date for several posts does not stagger them. Set different times before confirming if the posts should go out in sequence.
Read the result, including partial success
Sequence reports whether the batch scheduled successfully, failed, or only partly succeeded. A result such as “Scheduled 3 of 4” means the remaining post still needs attention.
Open Schedule to review the queued work, then inspect the individual destination states on any affected post. One post can have several accounts, and success on one account does not prove delivery to the others.
Correct the stated issue on the unsuccessful post or target, then retry only what still needs submission. Do not resubmit successful destinations to solve an unrelated failure. See fix a failed publishing target.
Change the batch after scheduling
Scheduled output is locked against ordinary content edits. To change the media, caption or scheduling details, follow reschedule or unschedule posts and confirm the revised schedule afterwards.
If you only want to change internal organisation, such as an assignee or project, use the relevant editing control. A bulk action may skip locked or ineligible posts; check its result rather than assuming every selected item changed.
Was this page helpful?
Related articles
- Fix failed publishingIdentify a failed account, correct its error and retry it without resubmitting successful destinations.
- Reschedule and time zonesCancel a queued schedule, check the time zone and submit the post for its new time.
- Prepare and preview a postReview media, captions, destinations and required platform settings before submitting a post.
- Send for approvalChoose the review step and reviewer for one or multiple posts, use Default per post for mixed batches and confirm the approval request.
Need more help with this?