
Custom fields let you track information Sequence doesn't record by default, such as a content pillar, call to action or filming location. You set a field up once, and each post keeps its own value, so you can show it on planner cards and filter, sort or group by it.
A custom field is separate from Sequence's built-in Status. A value named Client approval needed does not send an approval request or change publishing behaviour.
Brand fields and workspace fields
A field you create from a post, or from the brand's settings, is a brand field. It belongs to that brand, and other brands don't see it. Anyone who can edit the brand's content can create and change its brand fields.
A workspace field is shared by several brands, so it has the same name and options everywhere it is used. Workspace owners and admins create workspace fields and choose which brands use them; see Share custom fields across your brands. In a post, workspace fields appear below the brand's own fields. Anyone who can edit the post can set their values, but only workspace admins can change the fields themselves. For everyone else, a workspace field's settings show Workspace field. Ask a workspace admin to change it.
Add a field from a post
Every post lists the brand's fields in its details panel, with Add field at the end.
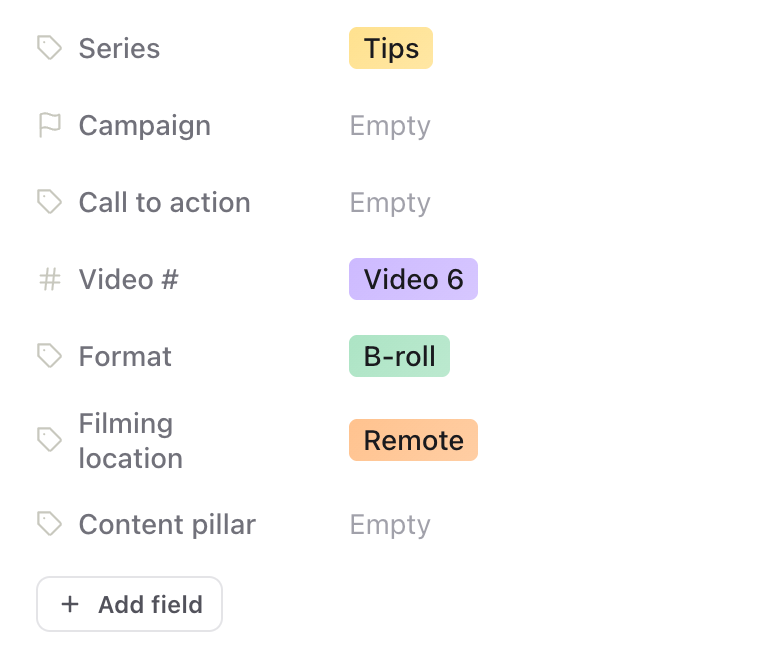
- 01Open a content piece.
- 02Below its fields, select Add field.
- 03Enter a Field name and, if useful, choose an icon.
- 04Choose a Field type: Text, Single select or Multi-select.
- 05For a select field, type each option into Search or create an option… and press Enter.
- 06Select Create field.
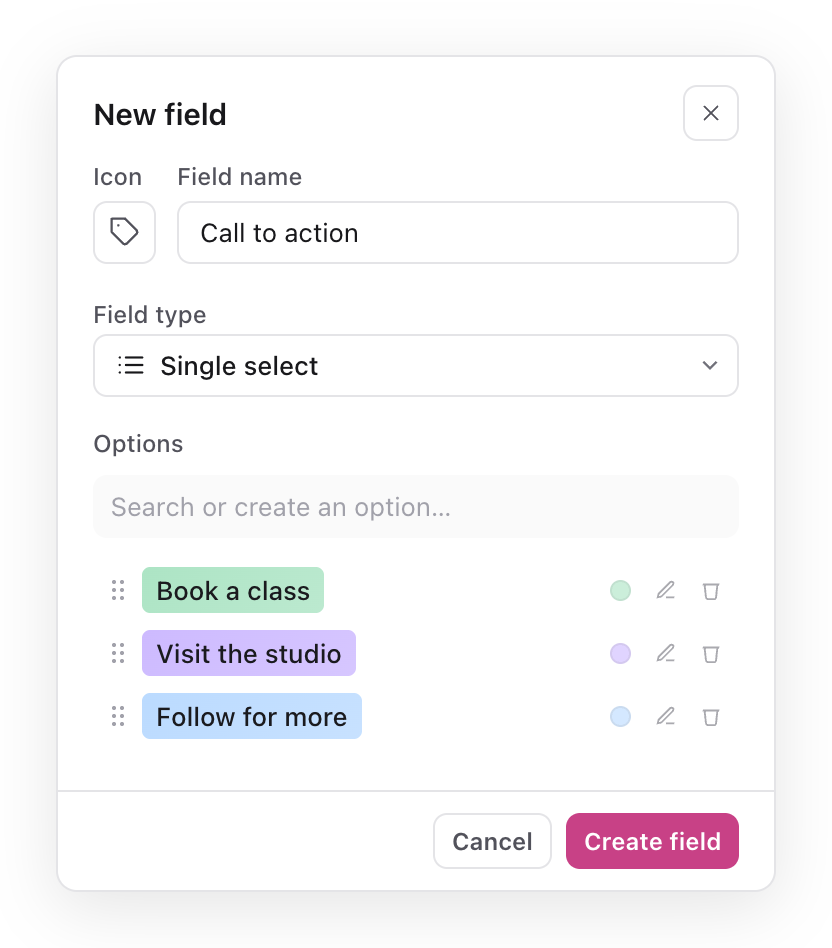
The field is added to every post in the brand, empty until you set it.
| Type | Suitable information | Example |
|---|---|---|
| Text | A short free-form value | Filming location or a reference note. |
| Single select | One option from a shared list | Ready to film, Filmed or Editing. |
| Multi-select | Several options from a shared list | Education, Behind the scenes and Product. |
In lists and settings, Single select and Multi-select fields are tagged Choice and Multi choice. The icon is only an icon: a number or calendar icon does not turn a field into a number or date.
Set a value on a post
Select the value beside a field. It reads Empty until you set one. For a select field, pick an option, or type a new one into Search or create an option… and press Enter to add it to the field. For a Text field, type the value.
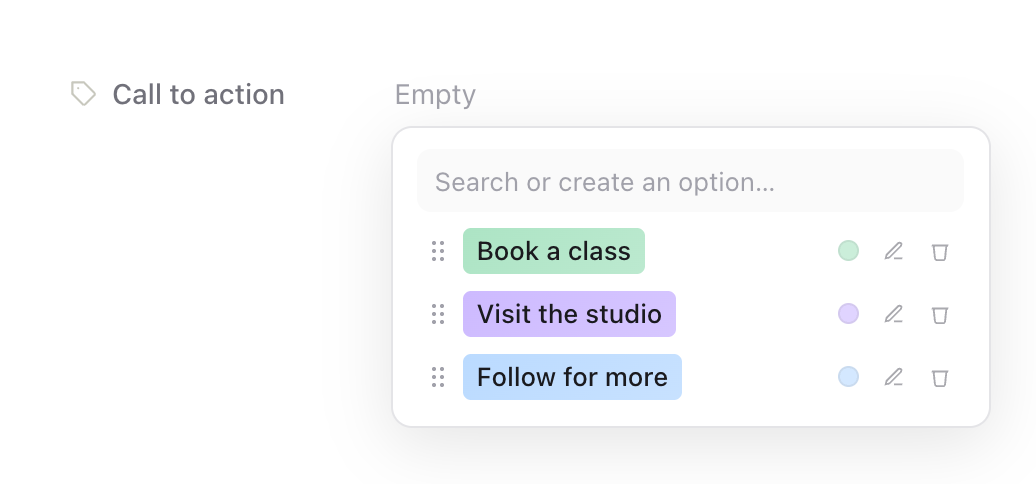
Reuse existing options with the same spelling so similar values don't split your filters and reporting.
For an agency workflow, a Single select field called Production stage can track Ready to film, Filmed and Editing while built-in Status tracks the main Sequence workflow. Keep the current owner in Assignee, and use an actual approval request when someone must make a decision.
Edit or delete a field
In a post, point to a field and select its edit icon, or select the field's name and choose Edit property. Edit field opens. Change the name, icon, type or options, then select Save changes. Changes apply to every post in the brand, or in every brand for a workspace field.
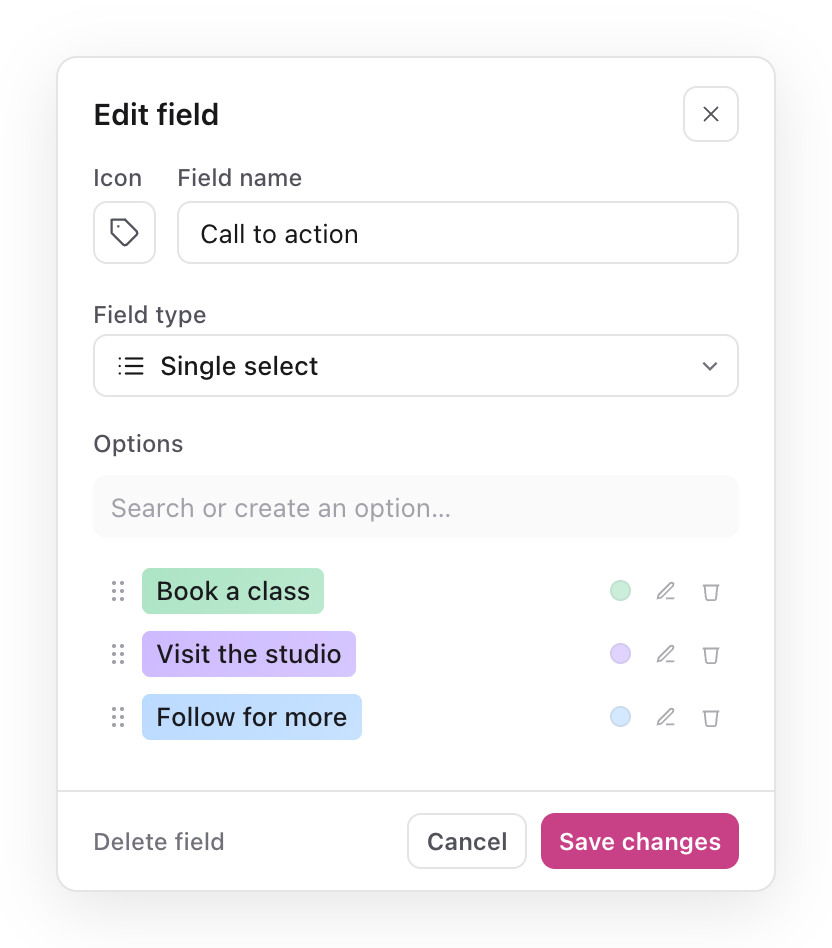
- Drag an option by its handle to reorder it, select its colour dot to change the colour, or select the pencil to rename it.
- To remove an option, select its bin icon twice. The option is cleared from every post that uses it.
- To remove the whole field, select Delete field, then Confirm delete. The field and its values are removed from every post, and this can't be undone.
Hide a field or show it on cards
To tidy a post's details panel, select a field's name and choose Hide property. The field and its values stay on the post; select Show all at the bottom of the panel to see hidden fields again. Hiding only changes your own view in this browser.
To show a field on planner cards, open the Fields menu in the planner toolbar and tick the field. Drag fields to change their order, then select Save to keep the change in the current view.
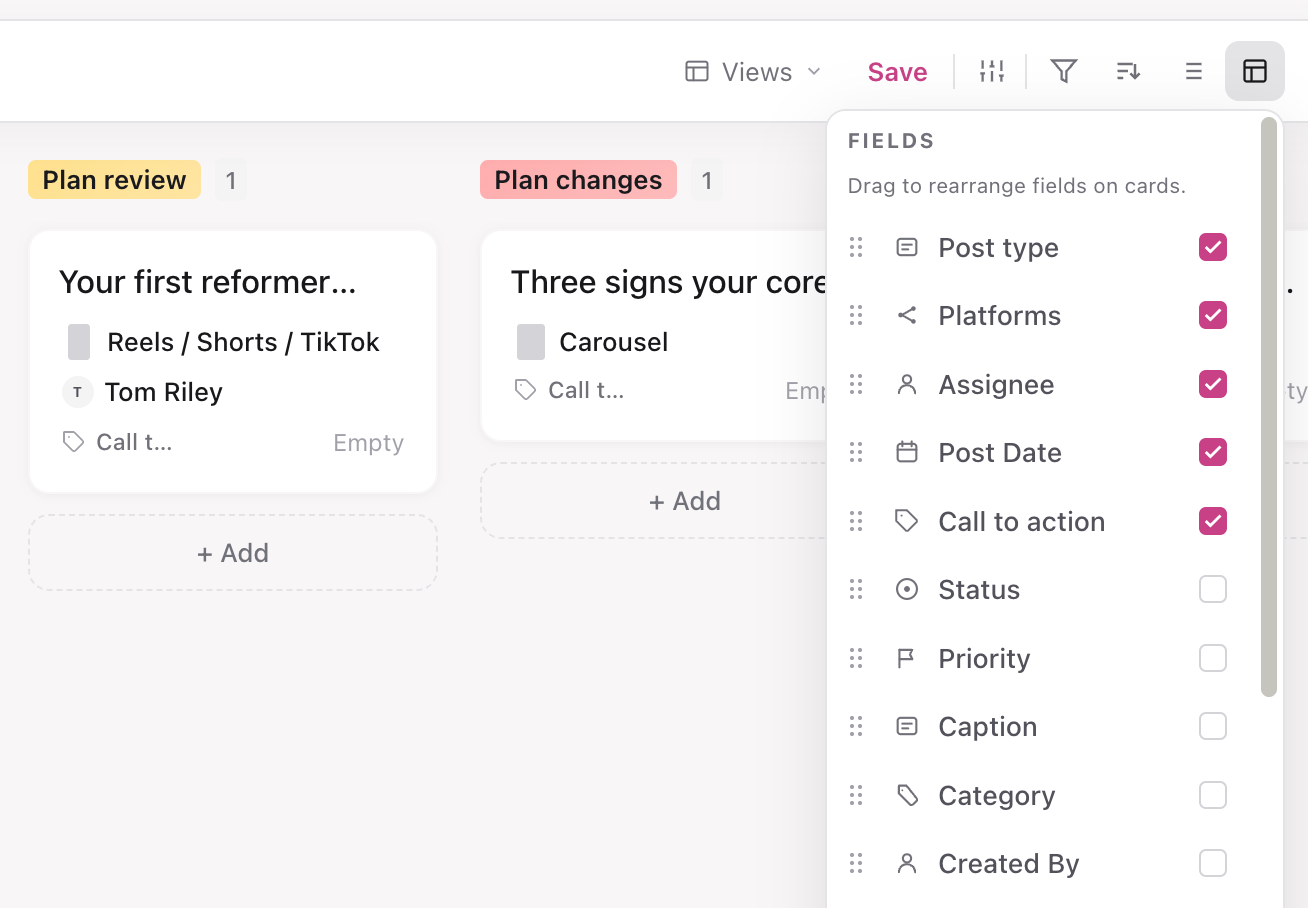
Custom fields are also available in the planner's Filter, Sort and Group menus; see Filter, sort, group, and search content.
Manage all of a brand's fields in Settings
Open Settings, then under Current brand select Custom fields to see every field the brand uses in one list: its own fields first, then workspace fields marked From workspace. Select a row to edit it, drag rows to reorder them, or use a row's ... menu to merge or delete a field.
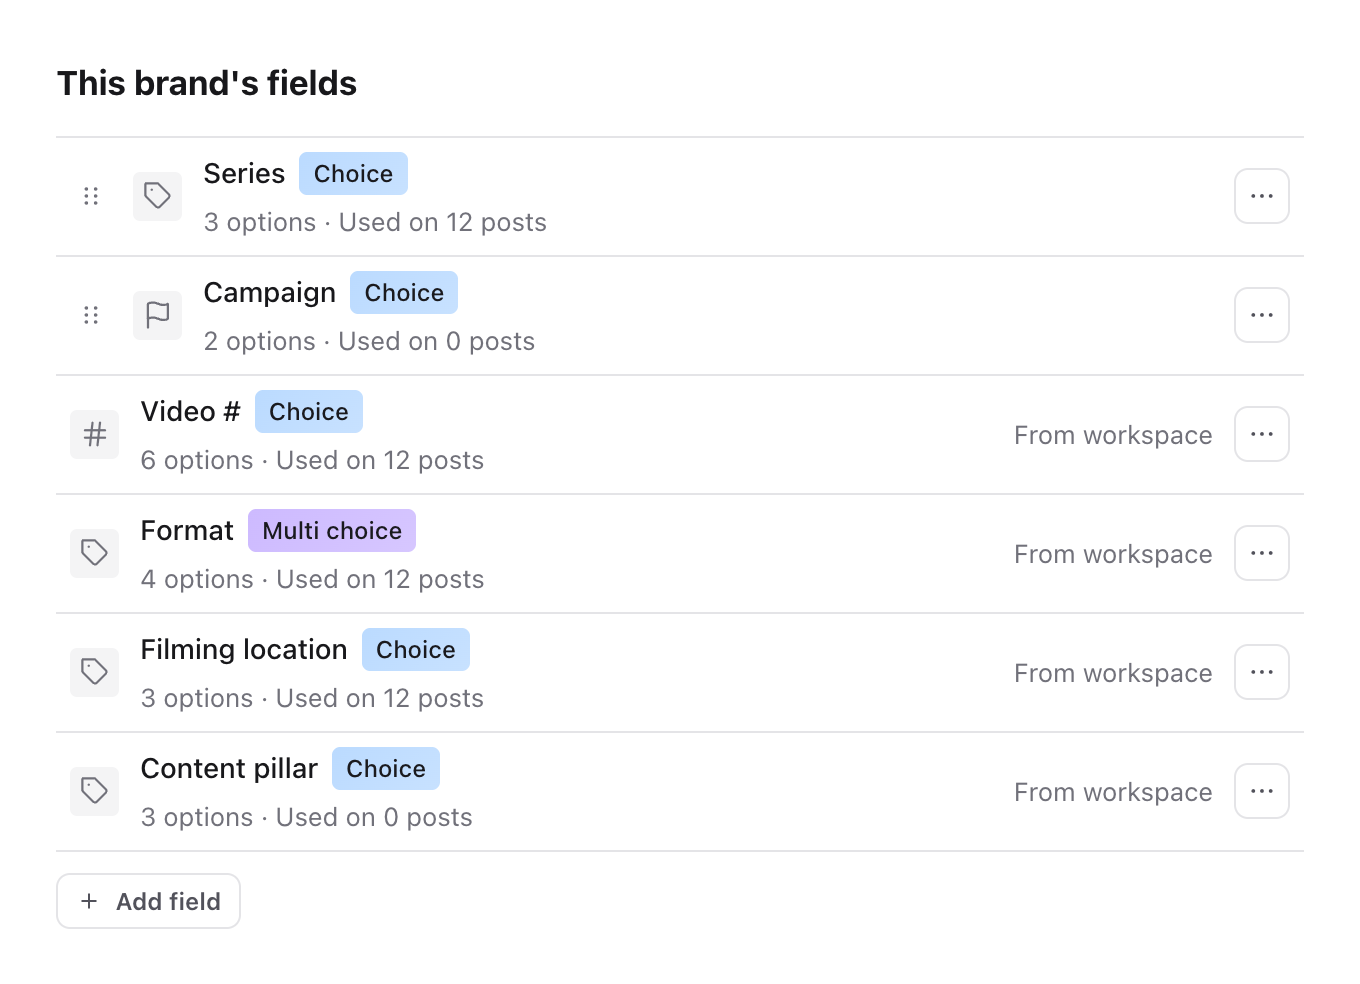
Use content statuses for changes to the status workflow itself, and workspace custom fields to share a field across brands.
Was this page helpful?
Related articles
- Workspace custom fieldsCreate workspace fields once, choose which brands use them, and tidy up brand fields by merging or sharing them.
- Filter and search contentFilter a busy planner, sort by the right property and group work without changing the content itself.
- Send for approvalChoose the review step and reviewer for one or multiple posts, use Default per post for mixed batches and confirm the approval request.
Need more help with this?