
Workspace custom fields let you set up a field once and use it in several brands. Every brand that uses it shares the same name, type and options, so saved views, filters and content templates work the same way across those brands. Each brand can still keep its own fields alongside.
What is a workspace field?
Sequence has two kinds of custom field:
- Workspace fields belong to the workspace. Workspace owners and admins create and edit them, then choose which brands use them. A change applies to every brand using the field.
- Brand fields belong to one brand. They are set up from that brand, and other brands don't see them.
Either way, each post keeps its own value. Only workspace owners and admins can change a workspace field's name, type or options. Anyone who can edit a post can still set its value; if they open the field's settings from the planner, Sequence asks them to contact a workspace admin.
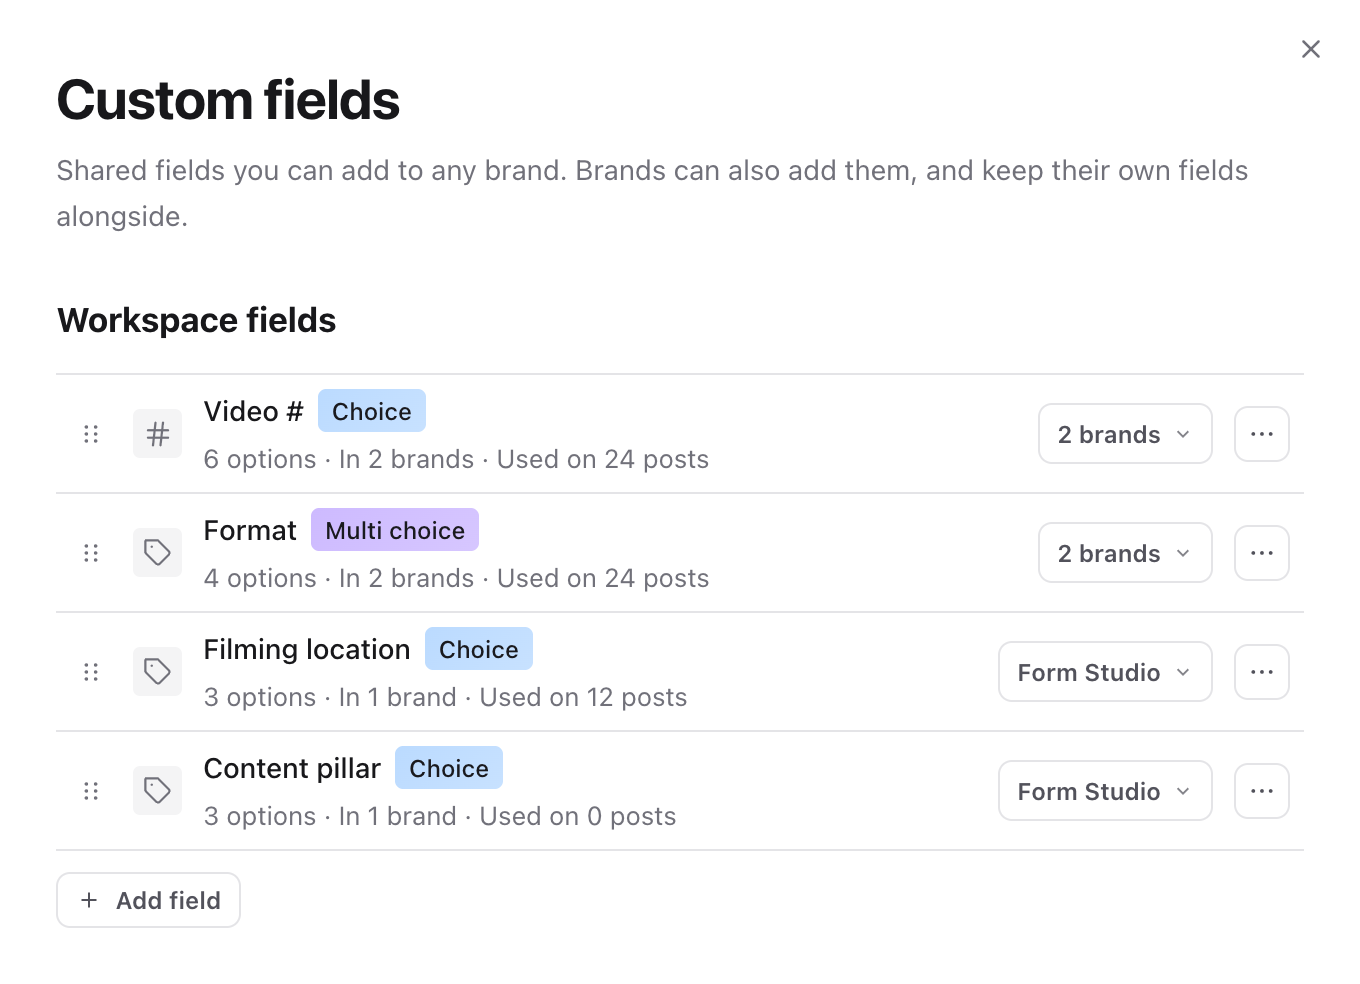
Create a workspace field
- 01Open Settings, then under Workspace select Custom fields.
- 02Below Workspace fields, select Add field.
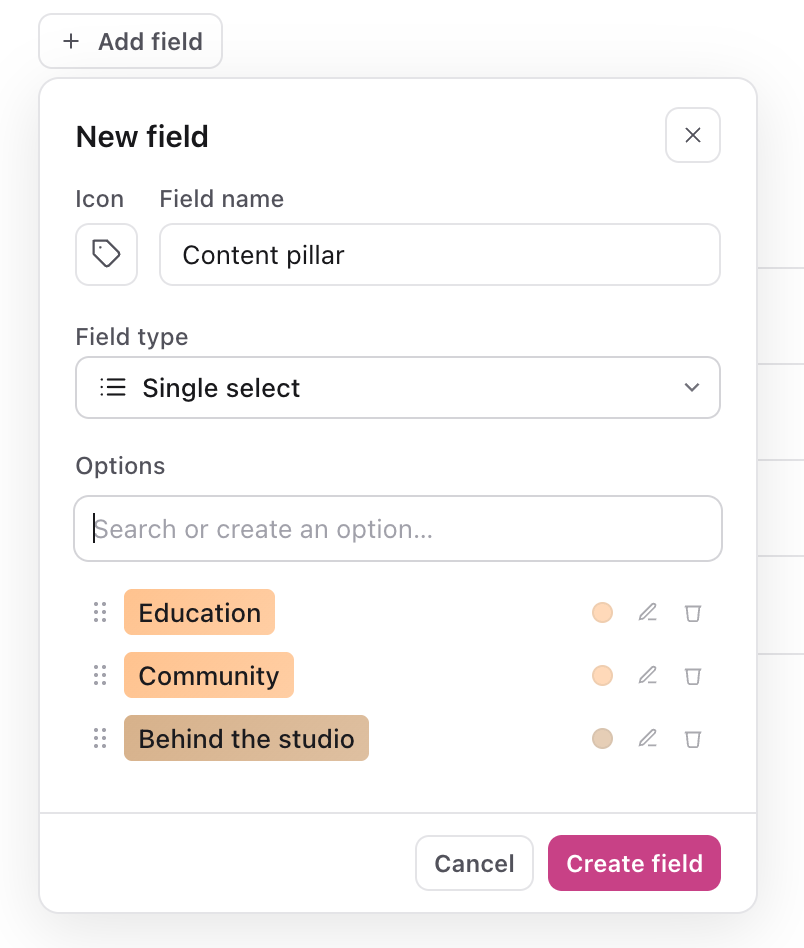
- 03Enter a Field name, choose an icon and a Field type: Text, Single select or Multi-select. For a select field, type each option into Search or create an option… and press Enter.
- 04Select Create field.
After you create the field, a brand list opens so you can choose where it is used. Tick each brand that should use it. Brands can also add it themselves later from their own Custom fields settings.
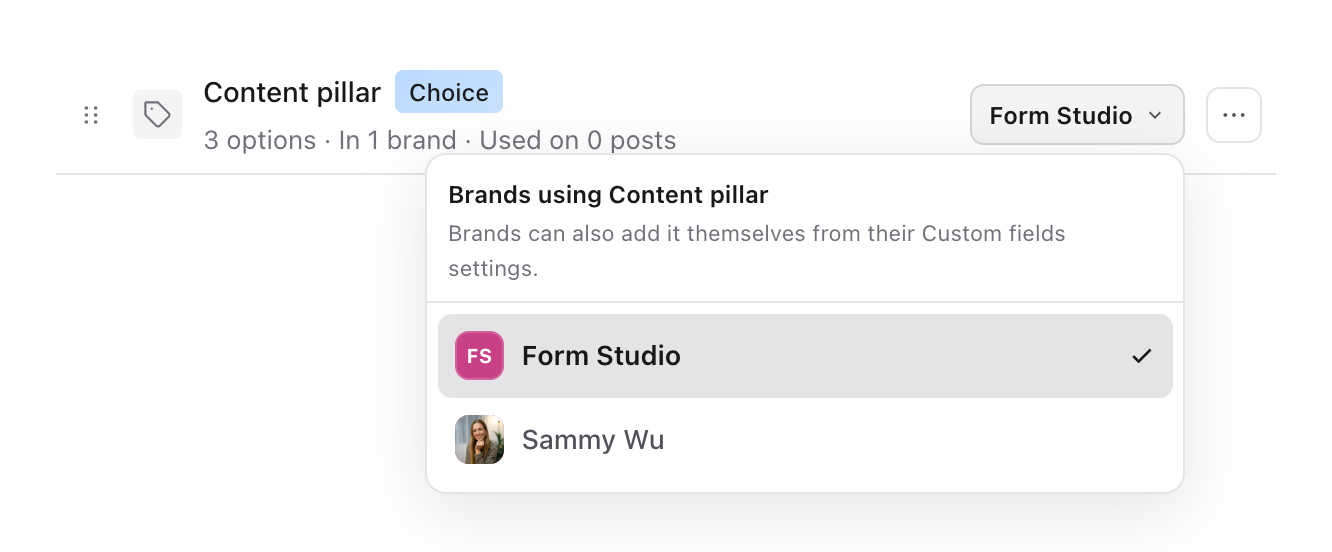
To change the brands later, select the brand button on the field's row, such as Form Studio or 2 brands.
Edit, reorder or delete a workspace field
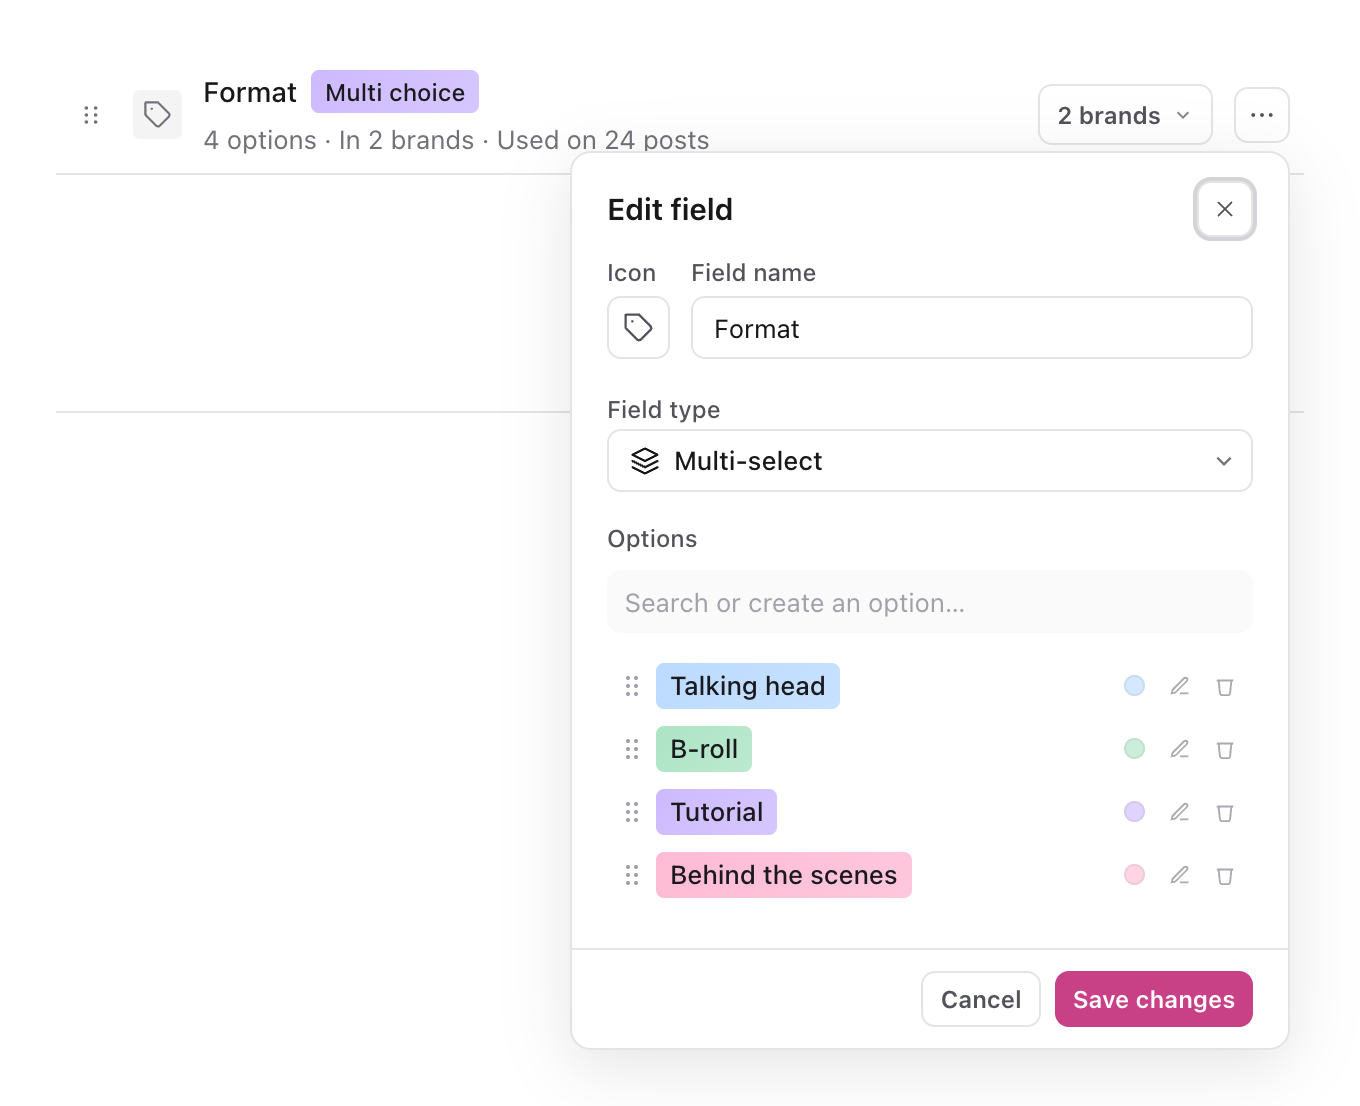
Select anywhere on a field's row to open Edit field. Change its name, icon, type or options, then select Save changes. The change applies in every brand that uses the field.
- To reorder fields, drag a row by the handle on its left.
- The row's ... menu has Edit, Merge with… and Delete.
- Merge with… folds the field you pick into the one whose menu you opened. Brands using either field keep the combined field, and values on posts are kept.
- Delete removes the field from every brand and clears its values from every post. This can't be undone.
Tidy up brand fields
Below your workspace fields, Brand fields lists every brand's own fields, grouped by name, with the most widely used first. Each row shows how many options, brands and posts it covers. Use this list to find fields that different brands set up separately.
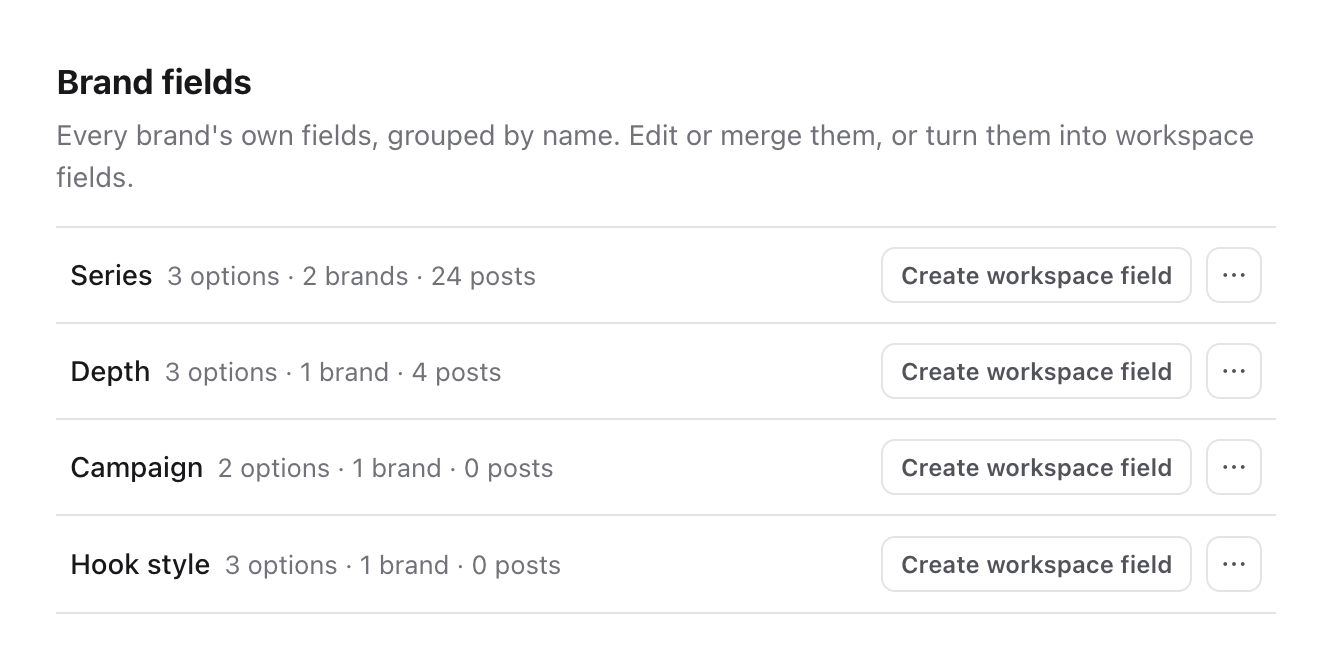
Turn brand fields into a workspace field
Select Create workspace field on a row. Sequence explains what will happen before anything changes: the brands' fields with that name become one shared workspace field with a combined option list, used by those same brands. Values on posts are kept, and only workspace admins can change the field afterwards. Select Merge into workspace field to continue.
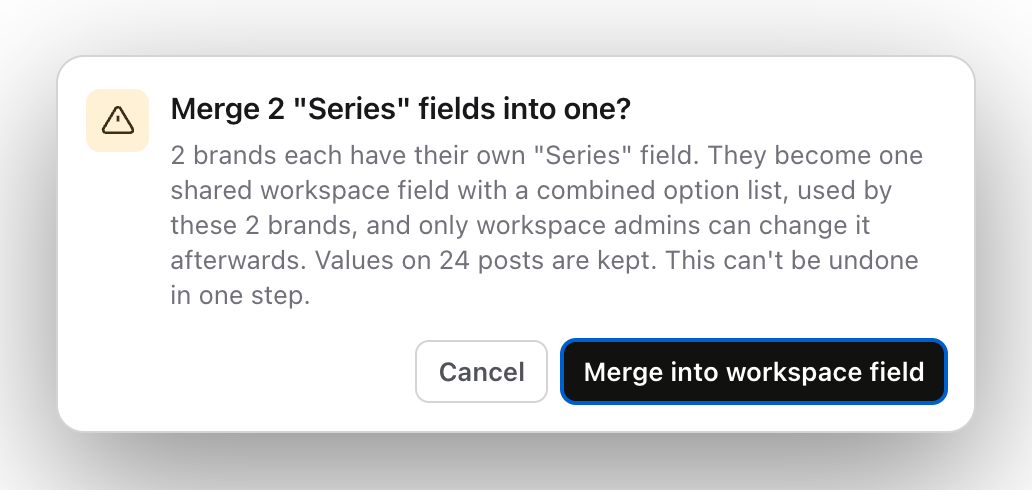
If a workspace field with the same name already exists, the button reads Add to workspace field and the brand fields are folded into it.
Edit, merge or delete brand fields
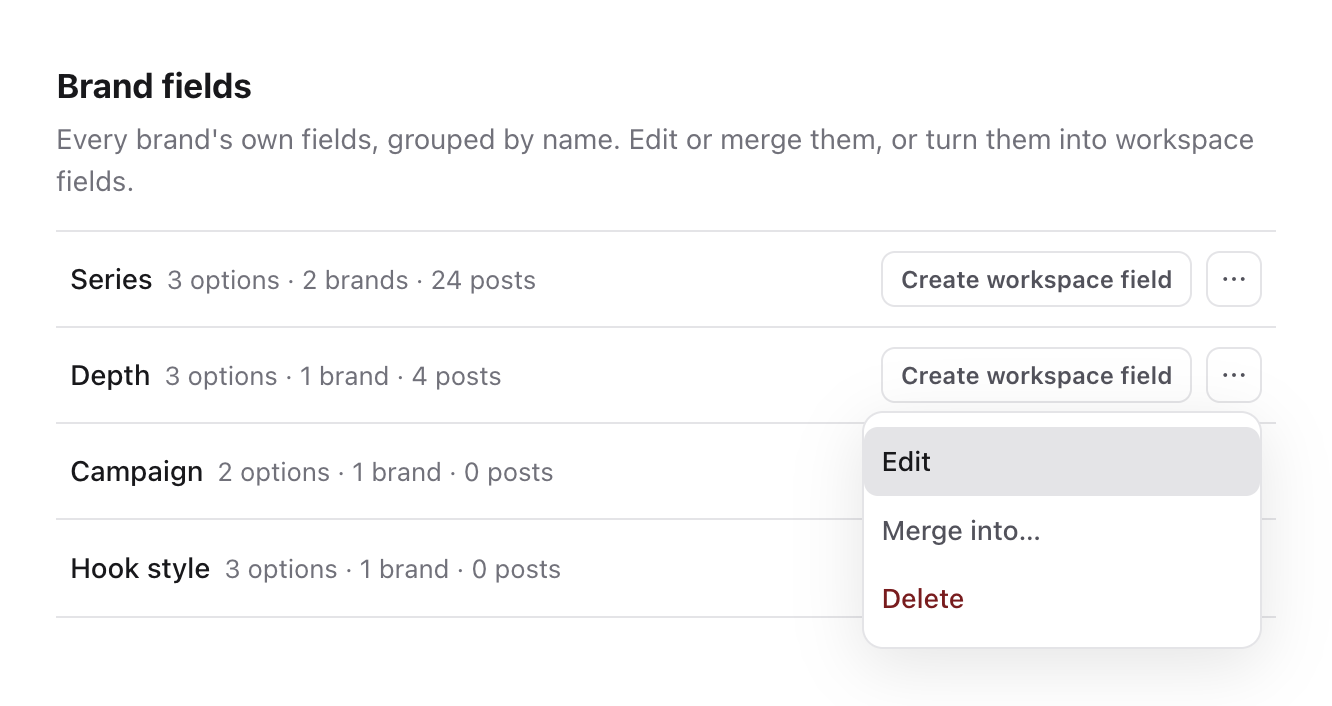
Open a row's ... menu:
- Edit changes the field in every brand listed on that row.
- Merge into… gives the fields another row's name. Where a brand has both, they are combined and values kept. Use it when brands named the same thing differently, such as Format / Style and Style / Format. The fields stay brand fields.
- Delete removes the field from every brand on that row and clears its values. This can't be undone.
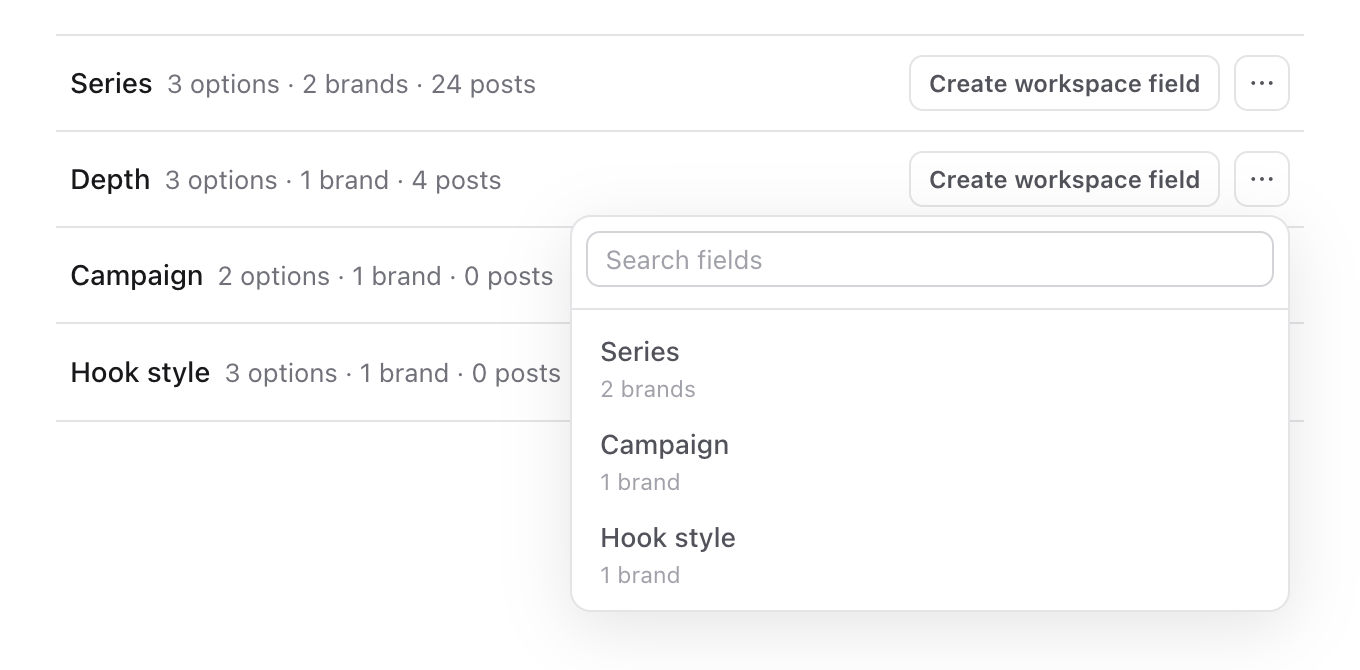
Workspace fields and brand fields can't be merged with each other. To combine them, first turn the brand fields into a workspace field.
Use workspace fields in a brand
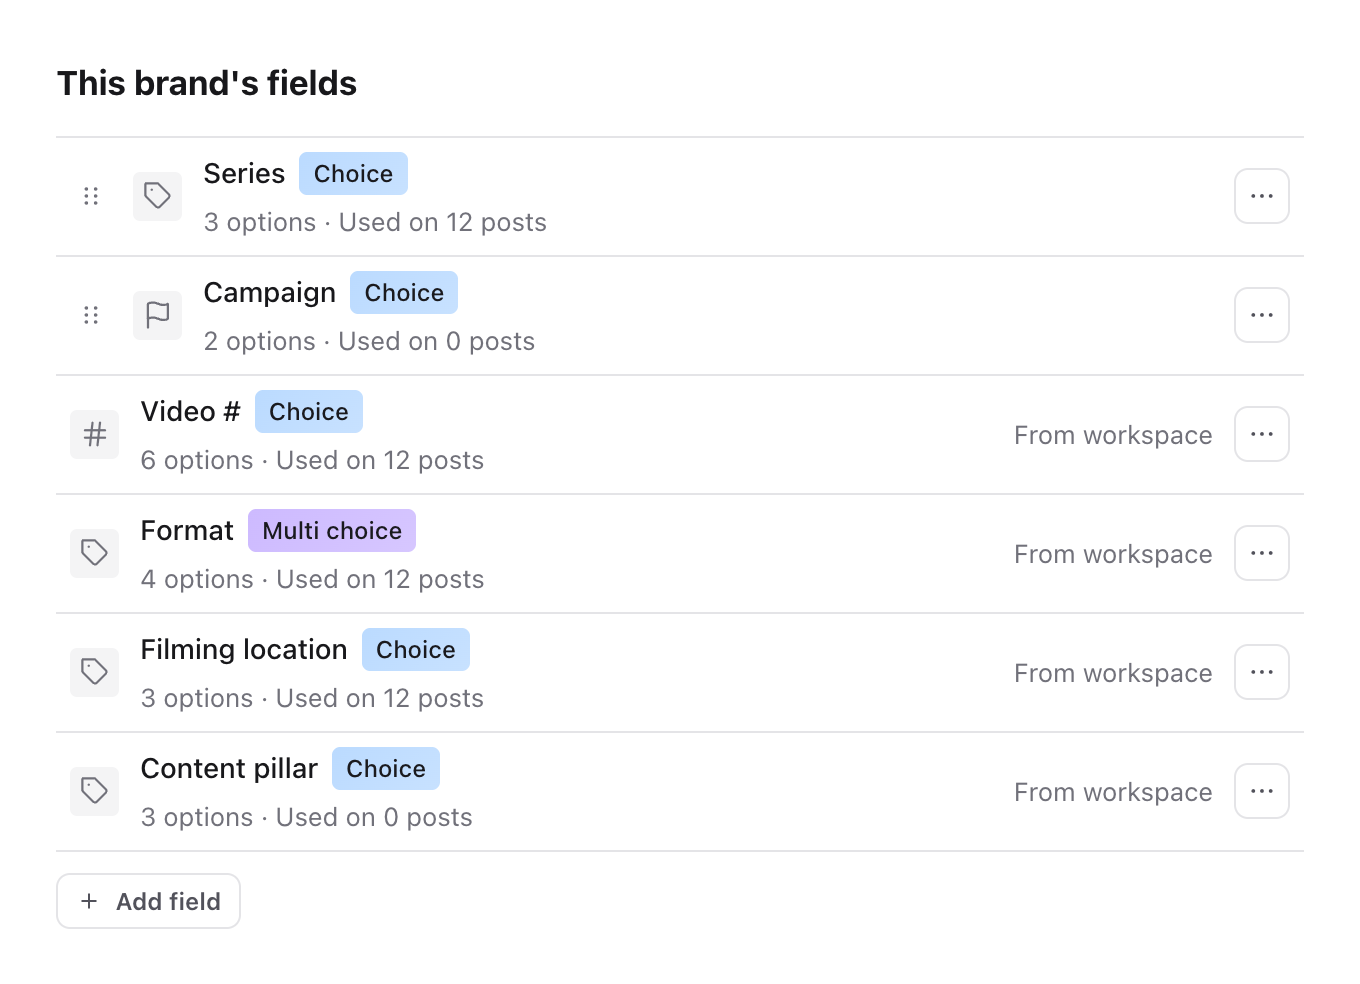
Open Settings, then under Current brand select Custom fields. This brand's fields lists the brand's own fields first, then the workspace fields it uses, marked From workspace. Drag the brand's own fields to reorder them.
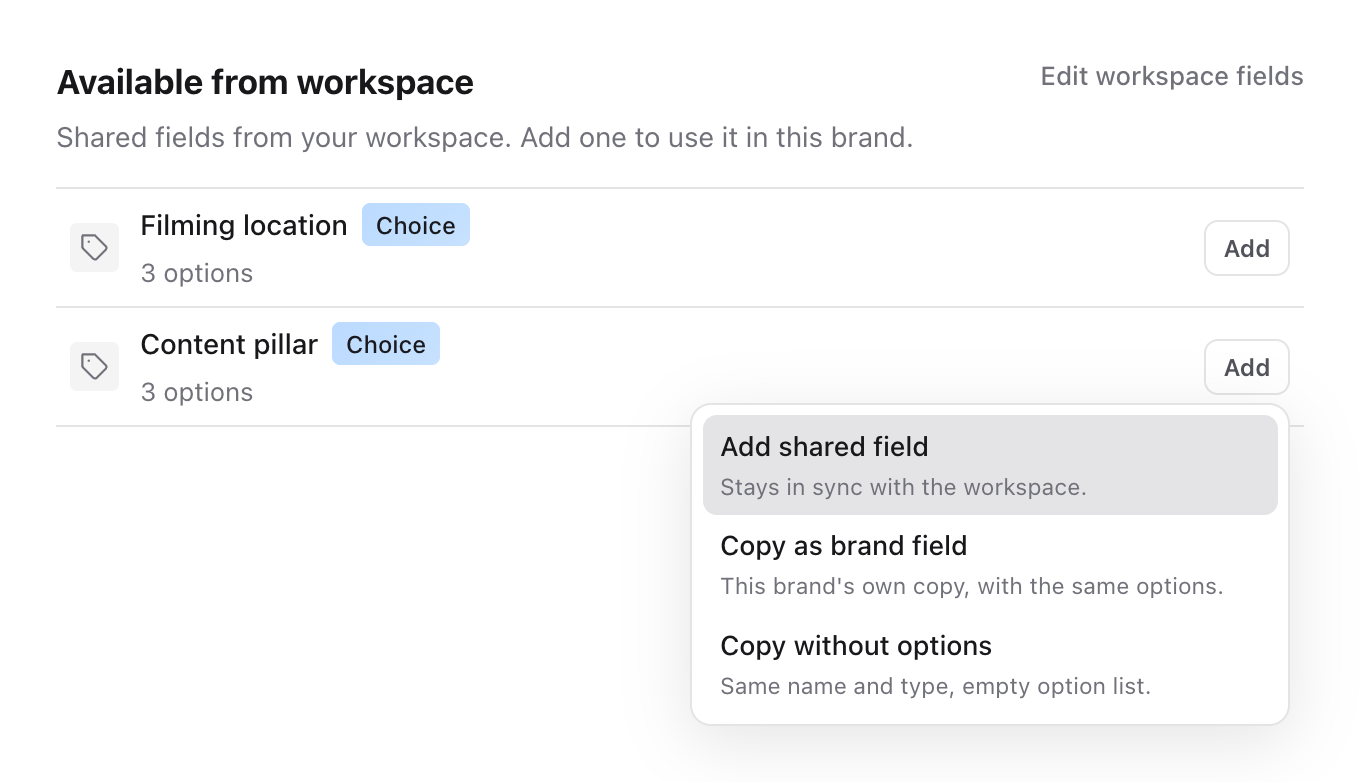
Available from workspace lists the workspace fields this brand doesn't use yet. Select Add and choose:
- Add shared field keeps it in sync with the workspace.
- Copy as brand field makes the brand its own copy with the same options. Later workspace changes don't affect the copy.
- Copy without options makes a brand field with the same name and type and an empty option list.
If the brand already has its own field with the same name, move that field to the workspace instead.
Change how a brand uses a field
The ... menu on a From workspace row offers:
- Remove from this brand: the field stops showing in this brand. Values on posts are kept, and adding it back restores them.
- Make brand-only: the brand gets its own copy with the same values. Other brands keep the workspace field.
- Edit in workspace settings: opens the workspace Custom fields settings.
A brand's own field has Edit, Move to workspace, Merge into another field… and Delete. Move to workspace turns it into a workspace field used by this brand, keeping its values.
Who can change custom fields
| Task | Who can do it |
|---|---|
| Create, edit, reorder, merge or delete workspace fields, and choose their brands | Workspace owners and admins |
| Create workspace fields from brand fields, Make brand-only, Move to workspace | Workspace owners and admins |
| Add or remove a workspace field in a brand, and manage the brand's own fields | Brand admins, workspace owners and workspace admins |
| Set a field's value on a post | Anyone who can edit the post |
To create fields from inside a content piece, see Create custom fields for your content workflow. To use fields in views, see Filter, sort, group, and search content.
Was this page helpful?
Related articles
- Custom fieldsAdd brand fields from a post, set their values, and edit, hide, show or delete them.
- Filter and search contentFilter a busy planner, sort by the right property and group work without changing the content itself.
- Content statusesCustomise status colours, add and reorder custom statuses, choose approval steps and set default review routes for your workspace or brand.
- Content templatesSave a complete content piece as a reusable brand or workspace template, then use it when creating new content.
Need more help with this?